
Manufacturing configurations
3D printing
| Parameter | Unit | Explanation | Required (Standard Design) | Required (Custom Design) |
|---|---|---|---|---|
| | | Describes how thick the structures can be. | Yes | Yes1 |
| | | Describes the channel width between structures. | Yes | Yes2 |
| | | The maximum allowed overhang angle. This property is set by default to 45°. | No | No |
| | | The maximum allowed unsupported cantilever length. This property is set by default to 2 millimeters. | No | No |
| | | The maximum allowed unsupported bridgeable length. This property is set by default to 4 millimeters. | No | No |
| | [-] | Dictates in what direction the structures are manufactured. | Yes | Yes |
|
1 In Custom Design, Rfmax is not respected. 2 In Custom Design, Rcmax is not respected. |
||||
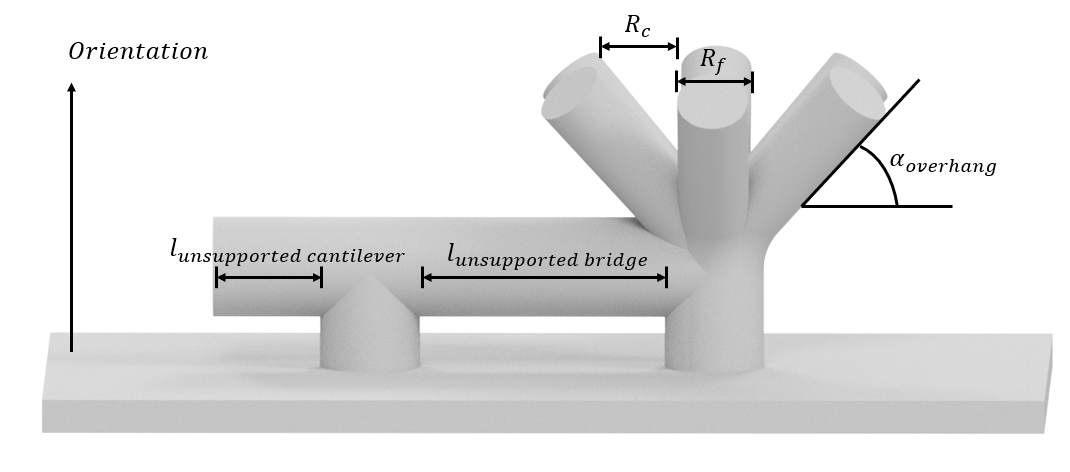
3D printing parameters.
CNC milling
| Parameter | Unit | Explanation | Required (Standard Design) | Required (Custom Design) |
|---|---|---|---|---|
| | | Governs the solid structure width. | Yes | Yes1 |
| | | Represents the milling tool and thus governs the channel width. This parameter also puts a limit on the inner curvature radius of structures. | Yes | Yes2 |
| | | Limits the channel depth. | Yes | Yes3 |
| | [-] | Gives the user control in which direction the channels are generated:
|
Yes | Yes |
|
1 In Custom Design, Rfmax is not respected. 2 In Custom Design, Rcmax is not respected. 3 In Custom Design, is by default equal to the full height of the design region. |
||||
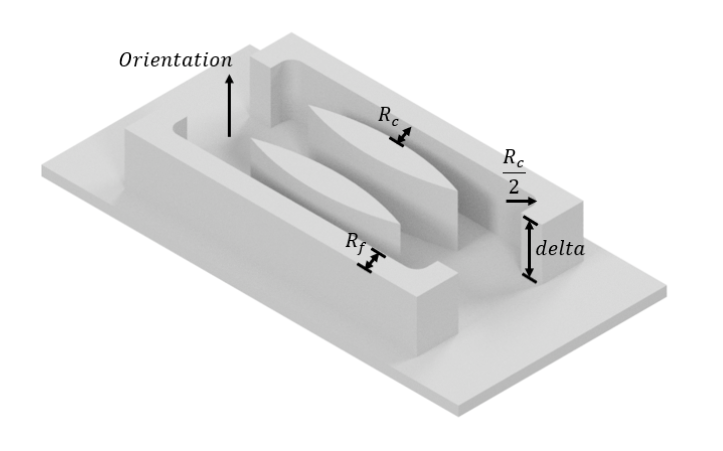
Planar CNC parameters.
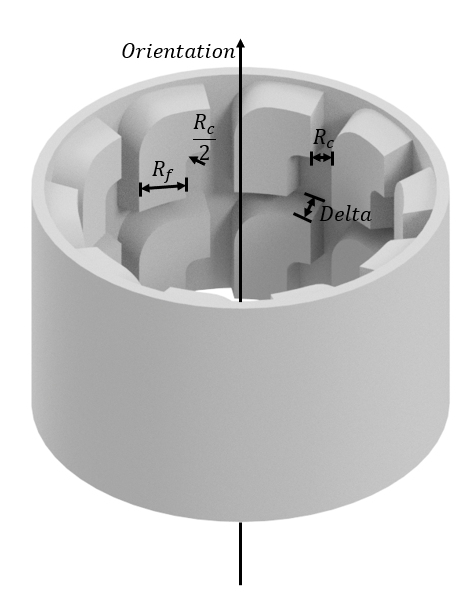
Radial CNC milling parameters.
NoteFor Standard Design, a baseplate is required to connect all the structures. The plate thickness is given by the minimum feature size:)/2 . The maximum plate thickness allowed is 66.7% of the delta.
Die casting
| Parameter | Unit | Explanation | Required (Standard Design) | Required (Custom Design) |
|---|---|---|---|---|
| | | Governs the solid structure width measured at the tip, excluding the fillets. | Yes | Yes1 |
| | | Governs the the minimal curvature radius of the solid structures. If no value was given, the default is set to the minimal structure width divided by 2. | No | No |
| | | Gives users control over the channel width between solid structures. If no lower or upper limits are provided, the default is set to the structure widths. | No | No2 |
| | | Governs what fillet is added at the root of the structures. | Yes | Yes |
| | | This parameter governs what fillet is added at the tip of the structures. | Yes | Yes |
| | | The draft angle of the fins. | Yes | Yes |
| | | The maximum height of the cooling structures. | Yes | Yes3 |
| | [-] | Gives users control in which directions the cooling structures are generated | Yes | Yes |
|
1 In Custom Design, Rfmax is not respected. 2 In Custom Design, Rcmax is not respected. 3 In Custom Design, is by default equal to the full height of the design region. |
||||
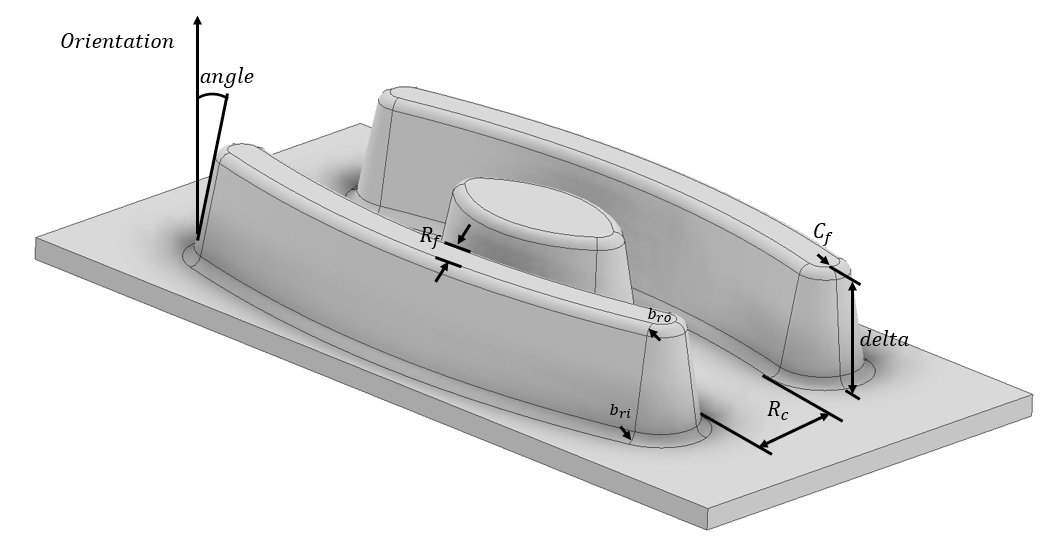
Die Casting parameters.
NoteFor Standard Design, a baseplate is required to connect all the structures. The plate thickness is given by:
Where:
⋅tan(π/4−α/2)
⋅tan(π/4−α/2)
The maximum plate thickness allowed is 66.7% of the delta.
Sheet metal forming
| Parameter | Unit | Explanation | Required (Standard Design) | Required (Custom Design) |
|---|---|---|---|---|
| | | Governs how wide the added structers can be. If no parameters are provided, the structure width will be identical to the channel width. | No | No1 |
| | | Lower limit of the structure's curvature radius. If no parameter is specified, the curvature radius is equal to the minimal structure width divided by 2. | No | No2 |
| | | Governs how wide the channels can be. | Yes | Yes |
| | | Specifies what fillet radius should be added at the root of the structures. It is measured on the inside of the bend. | Yes | Yes |
| | | Specifies what fillet radius should be added at the tip of the structures. It is measured on the inside of the bend. | Yes | Yes |
| | | The thickness of the stamped plate. | Yes | Yes |
| | | The chamfer angle of the channels. | Yes | Yes |
| | | The height of the fluid region. | Yes | Yes |
| | [-] | The normal of the stamped plate. | Yes | Yes |
|
1 In Custom Design, Rfmax is not respected. 2 In Custom Design, Rcmax is not respected. |
||||
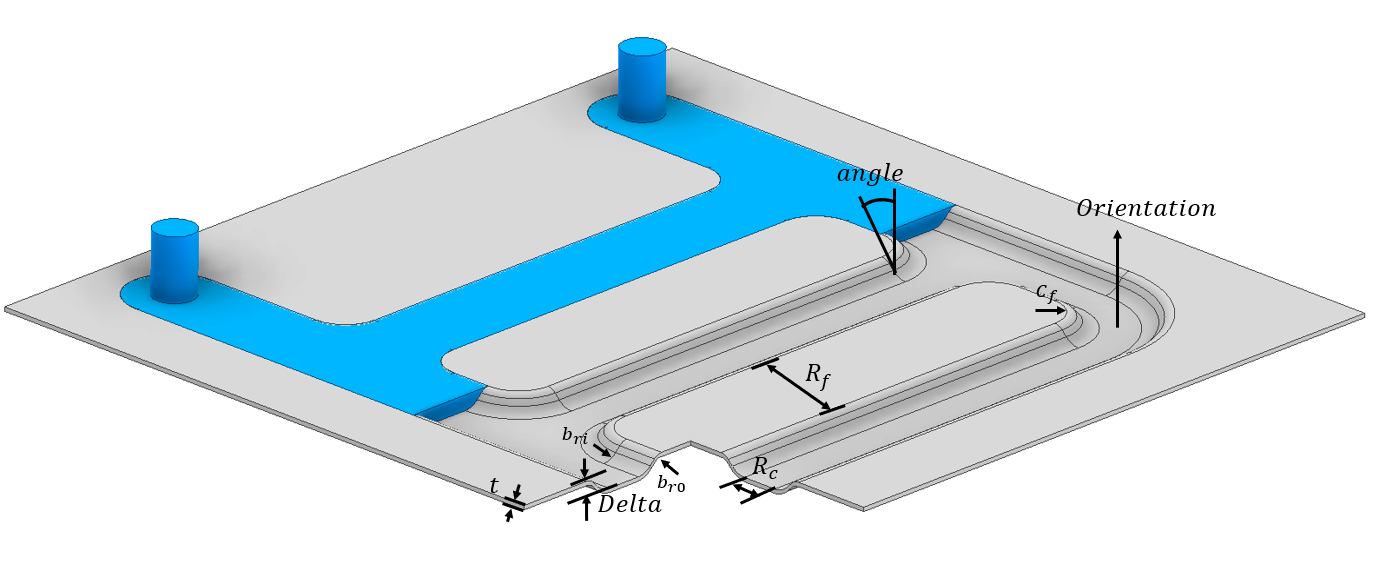
Sheet metal parameters.
ImportantThe design region for sheet metal formed cases should be tall enough for both the fluid channels as well as the plate thickness! The design region height should thus be equal to the sum of channel height (delta) and the plate thickness (t). The fluid domain should locally be increased in height with the plate thickness (t) wherever there is a design domain.
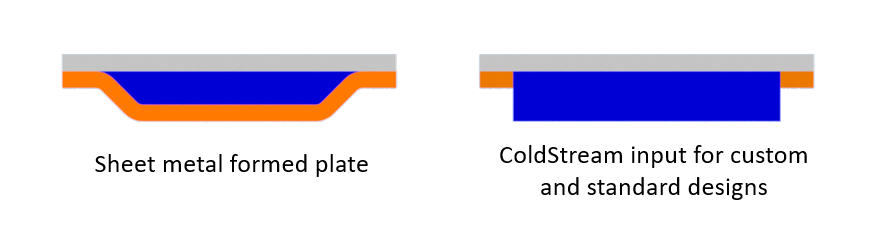
Slice view of the final sheet metal formed design on the left and what ColdStream expects as input on the right.
Click here to download an example STEP file.
Selecting manufacturing settings
The manufacturing method and its governing parameters must be configured during the setup of the design region. Once a primary manufacturing method is selected, an associated parameter set must be assigned. This can be either a predefined set from the library or a custom-configured parameter set.
Defining manufacturing dimensions
The specified manufacturing dimensions (such as minimum wall thicknesses or channel sizes) must closely align with the overall dimensions of the design region and realistically reflect the expected geometry.
- Oversized dimensions: Setting minimum feature sizes too large relative to the available design volume will severely restrict the generative solver, resulting in poor or completely unfeasible designs.
- Undersized dimensions: Setting minimum feature sizes too small may force the solver to generate an overly complex, micro-detailed structure. This artificially increases the computational load and can complicate the actual physical manufacturing process.
ImportantA specific orientation axis must be defined for manufacturing constraints. It is strictly required to verify the orientation of the uploaded CAD model to ensure the correct manufacturing axis is selected.
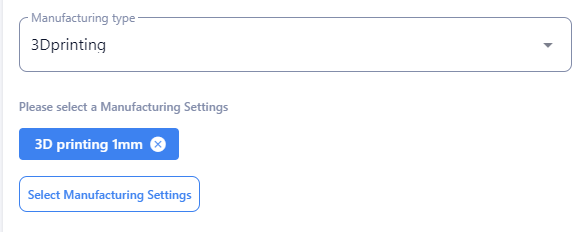
Manufacturing settings in the design subregion.
Adding manufacturing parameters
New manufacturing settings can be created using two different methods:
- Via Case Setup: Parameters can be defined directly while configuring a new optimization case.
- Via the Libraries Page: Navigate to the Libraries page, select the Manufacturing section, and click the Add settings button.
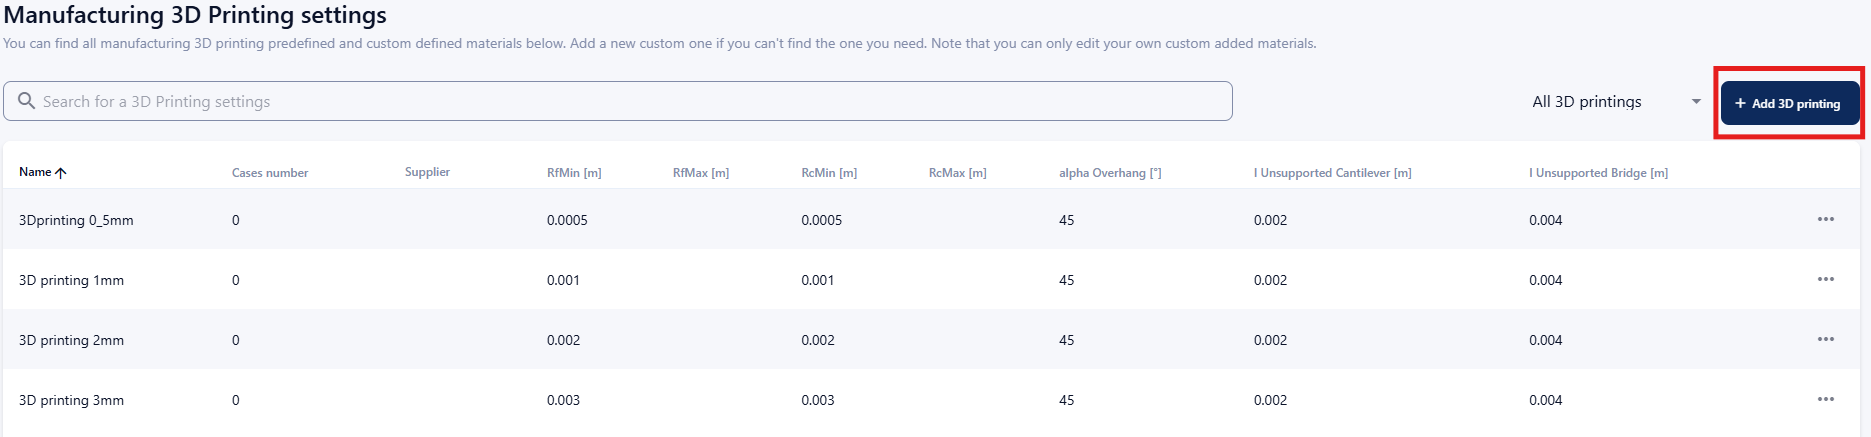
How to add manufacturing settings through the Libraries Page.
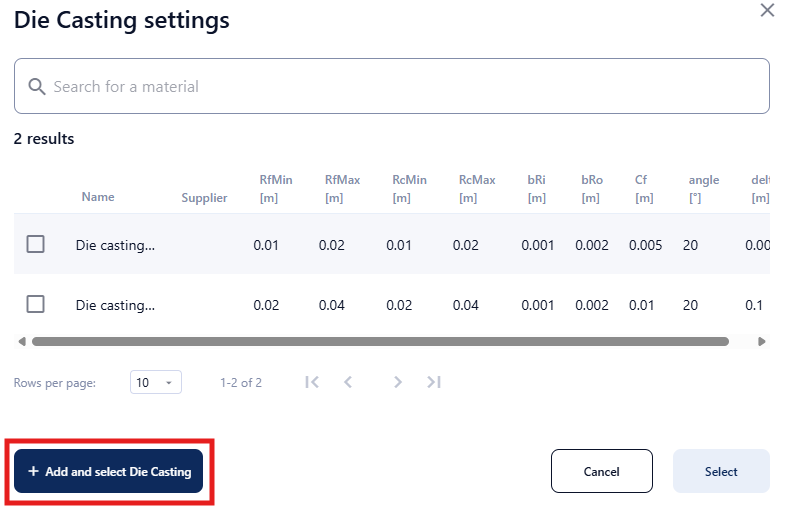
How to add manufacturing settings while setting up a case.
Updated 30 days ago