A general introduction of the projects tab
Introduction
The projects tab is the main landing page after logging into ColdStream and is also the main working page. This tab allows you to create, edit, and manage all your cases. This article serves as an introduction to the key functionalities of the projects tab and gives you an overview of its structure and workflow. The other articles focus on individual aspects of the workflow.
Create, edit, and delete project folders
Creating a new project folder
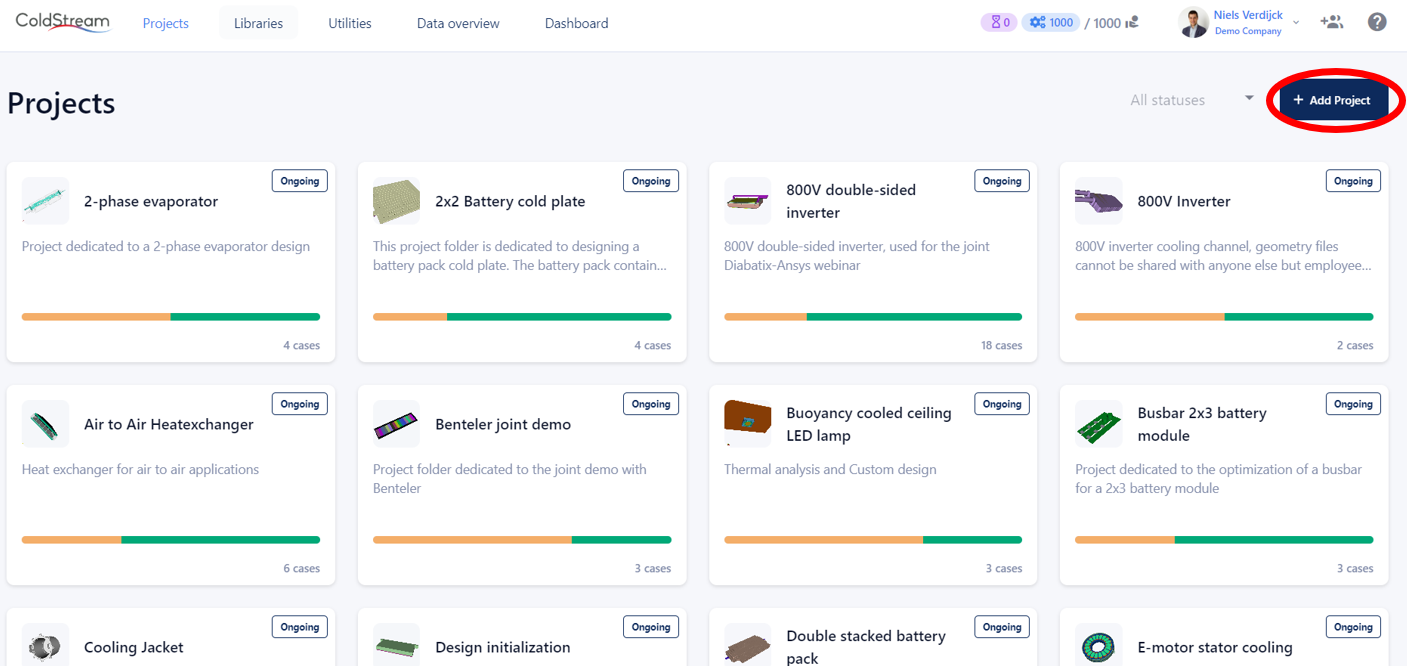
As mentioned in the introduction, the projects tab is the main landing page after you log in to ColdStream. This tab gives an overview of all the project folders you have access to. If there are no project folders available, you can click on the 'Add Project' button in the top right corner to create a new project. ColdStream will ask you to provide a name for the project as well as a description. Both of these are mandatory.
Create a new project folder in ColdStream
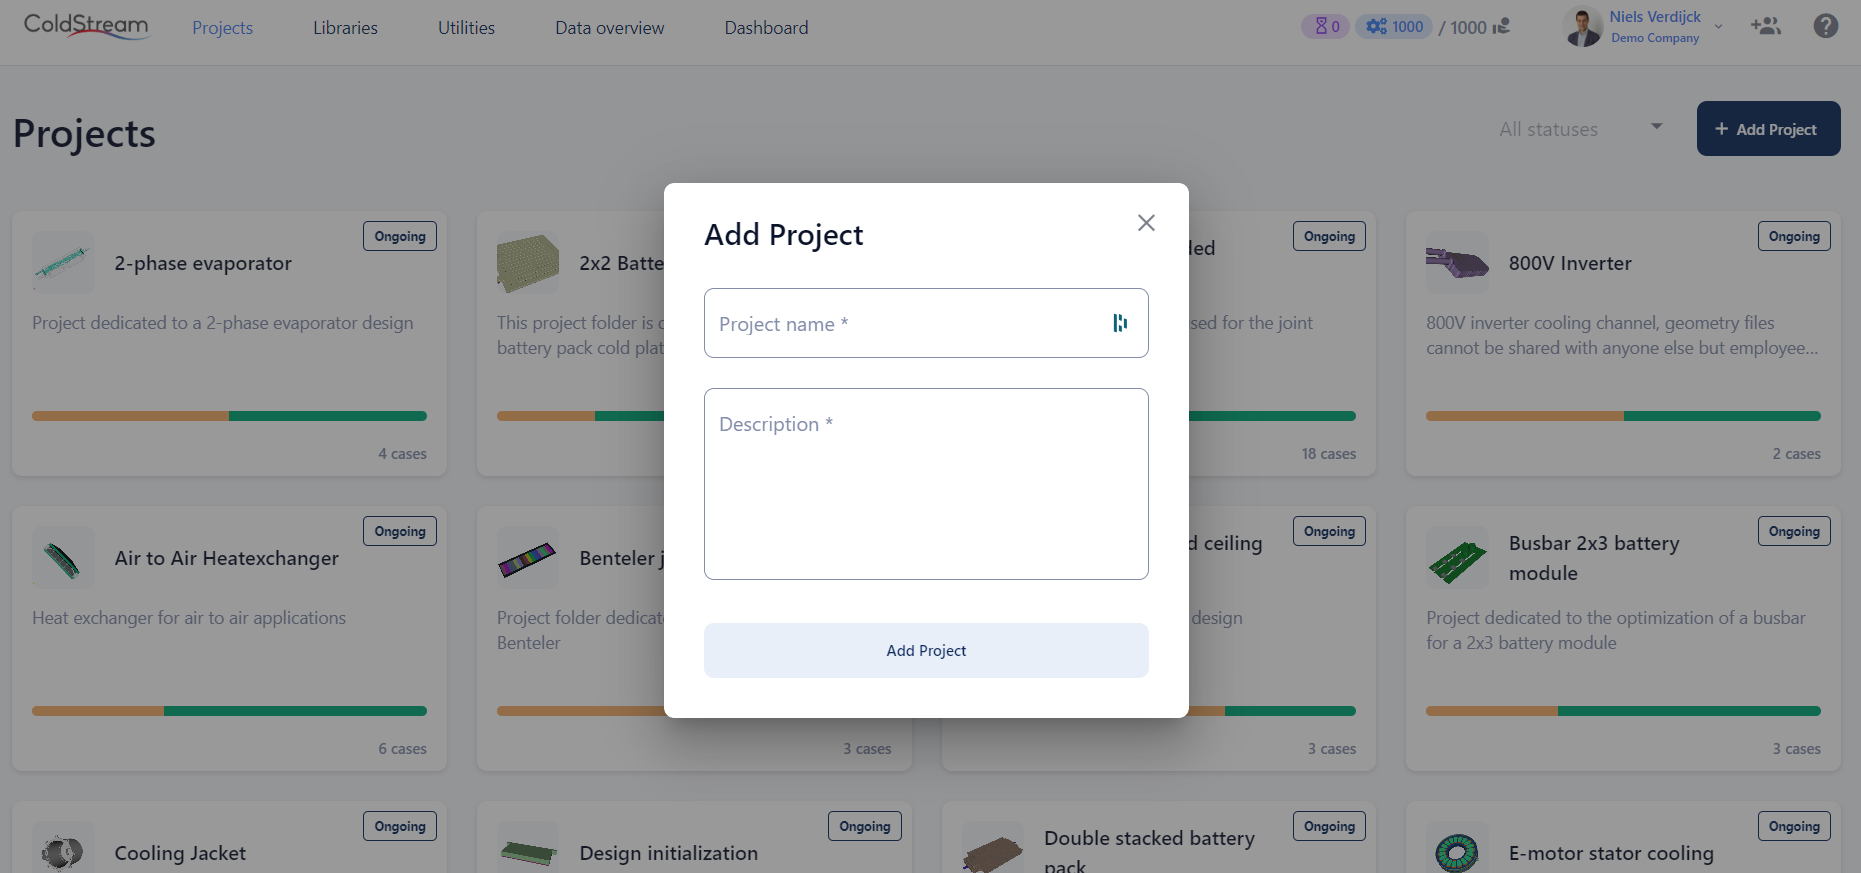
Input fields with the project name and description
Editing project folders
Project thumbnail
In the top left corner, you see a thumbnail of the project. This thumbnail can be enabled by any user to make it more clear what this project is all about. To create such a thumbnail, navigate to a case setup inside the project folder. In the case setup window, click on the camera icon. The pop-up window will allow you to set the current view as the project folder
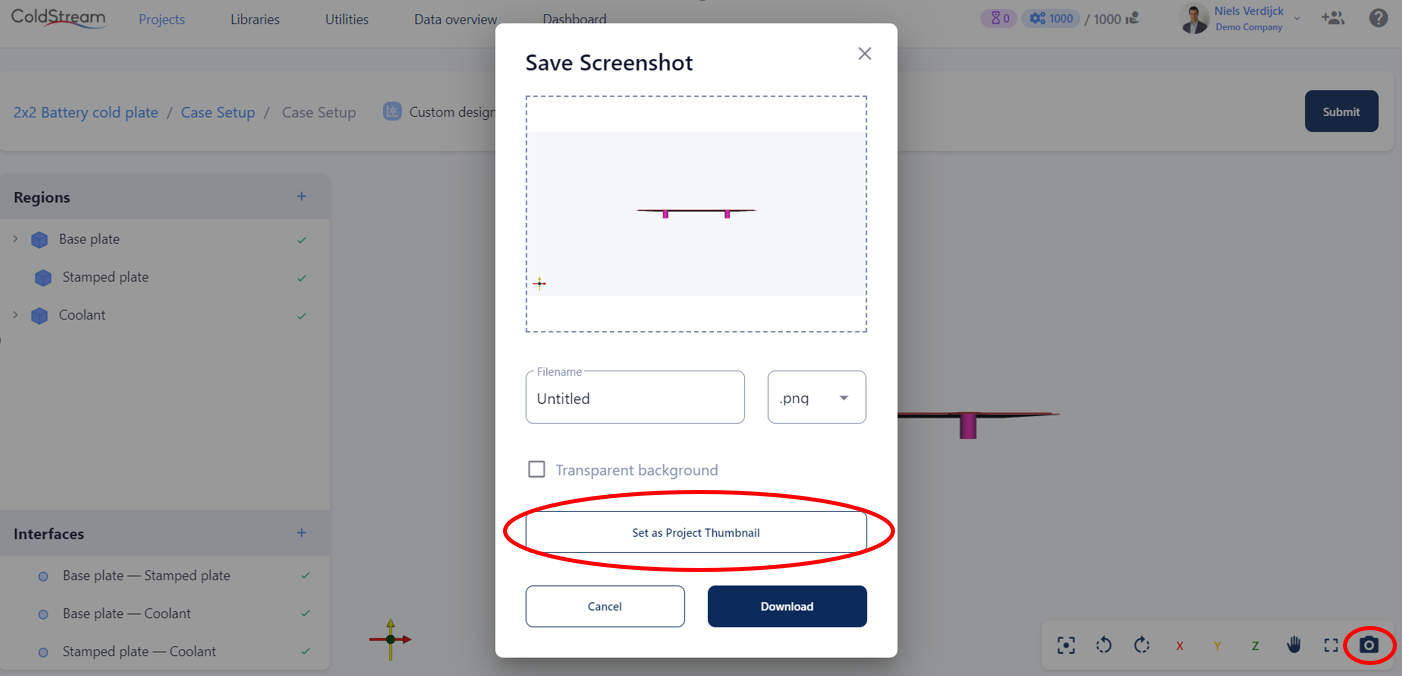
Setting the current view as project thumbnail
Edit the project name and/or description
If you would like to update the project name or the description, click on the desired project folder. This will navigate you inside that project. Click on either the project name or description to edit them. Don't forget to click on the checkmark to save the changes made or click on the cross to delete your changes.
Delete a project folder
To delete a project folder, navigate to the folder you wish to delete. Next, click on the trash icon in the bottom left corner. A pop-up window will appear to ask for your confirmation. To confirm, you need to type the project name and click on 'Yes'.
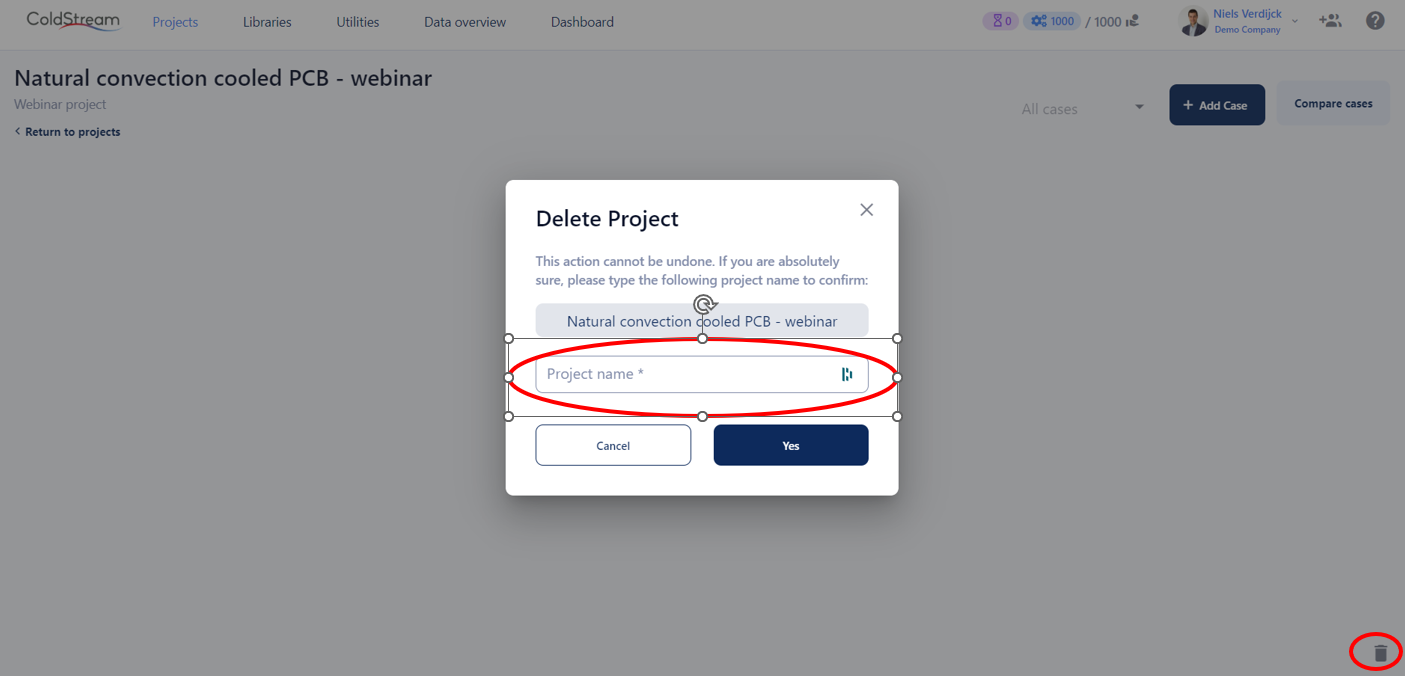
Deleting a project folder
ImportantDeleting a project folder will also permanently delete all the cases inside that project folder.
Information about the project and its cases
Every project folder displays information about the cases inside of it, giving you as a user a clear picture of what is going on inside of every project without the need to manually navigate to them.
Project status
In the top right corner of every project folder, the project status is shown. The status summarizes the main status of the project itself. There are 4 options, a project can be:
- Ongoing: at least one case inside this project is not on 'Finished'
- Problem: at least one case inside the project folder has an error
- Finished: all cases inside this project folder are completed
- Closed: the project folder is archived, and no more work is planned out for this project. To archive a project, click on the project status and click on 'Close project'.
By default, ColdStream will show you all projects. If you would like to filter out certain projects, click on the arrow to the left of the 'Add project' button and select which projects you would like to see.
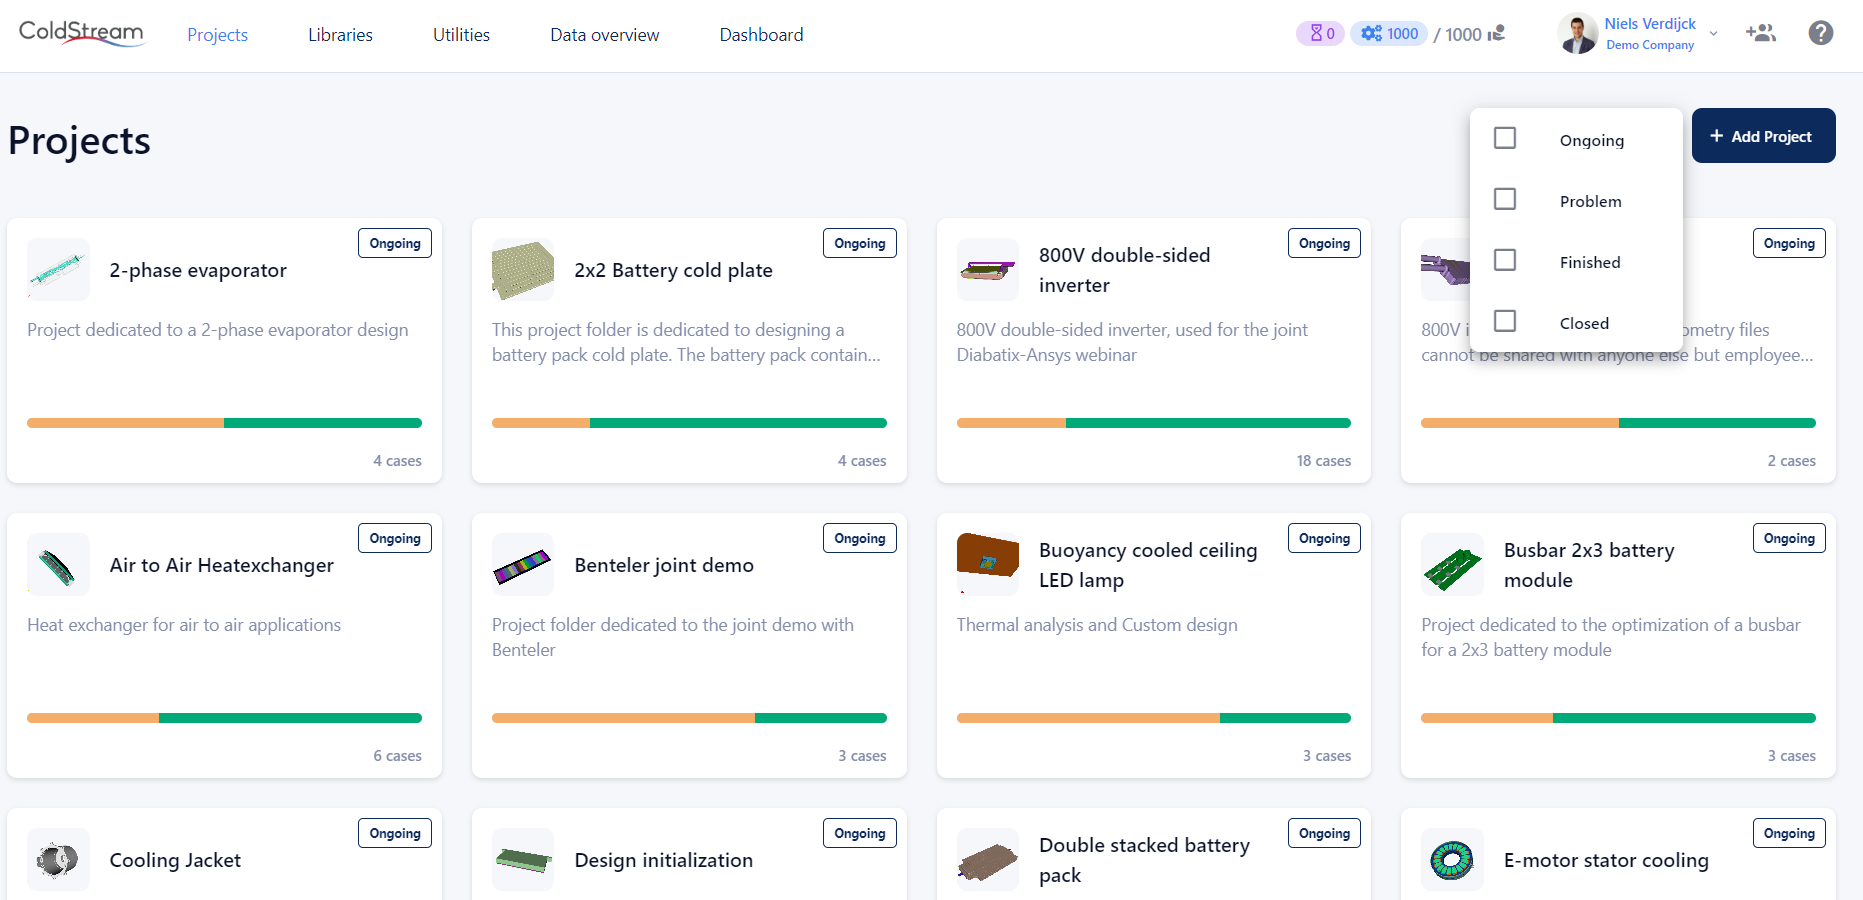
Filter out projects based on their status
Number of cases and their status inside a project folder
The bottom half of the project folder is reserved to display information about the cases inside that project. The lower right corner displays how many cases are present inside the project folder. The colored bar above it displays the status of each case. The colors can either be:
- Grey: there are no cases in this project
- Orange: this project contains cases that require input or are ready to be submitted
- Blue: this project contains cases that are actively running
- Green: this project contains cases that are finished and have results
- Red: this project contains cases that have errors
The colored bar is partitioned based on how many cases inside the project are of a given status. When you hover over each color, you will see how many cases are awaiting input, are finished, etc.
Updated 8 months ago